
Set up a Twitch overlay in OBS
Let the hub install it, point a browser source at it in OBS. Done.
An overlay of mine is an HTML file that runs inside OBS. No account, no server, no installation.
Step by step
// How it works
-
01
Let the Config Hub install it
Open the Config Hub. It asks you for a folder on your drive first, then you tick the overlays you want and enter your Twitch channel name. When you click Install now it writes the
widget.htmland a matchingconfig.jsinto exactly that folder and nowhere else. This needs Chrome or Edge, because they are the only browsers that let a web page write into a folder. In Firefox and Safari the hub shows the manual route instead: download the overlay as a zip and the ready-madeconfig.jsseparately, unpack the zip, put theconfig.jsnext to the widget, then carry on with step 2.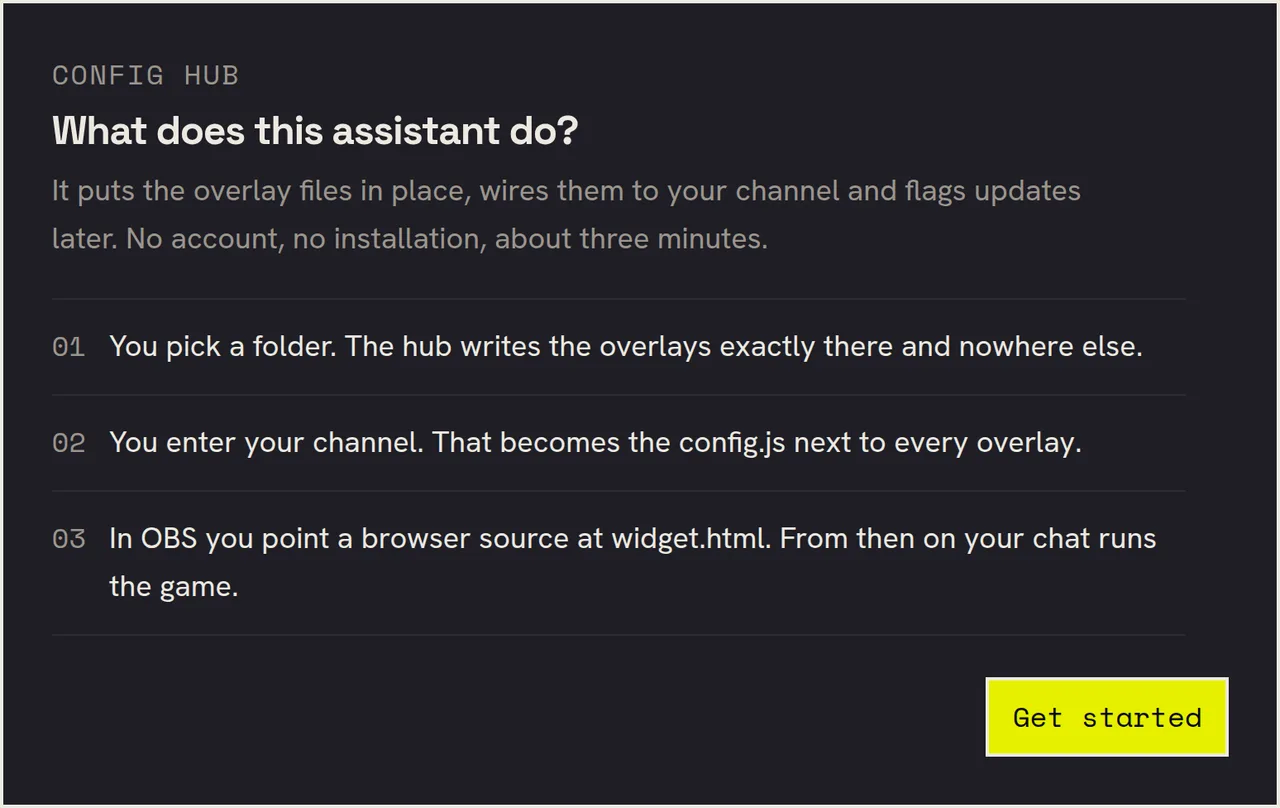
The hub states what it is about to do before it touches anything. Step 3 in that list is the only one left for you afterwards. -
02
Add a browser source in OBS
A browser source is the source in OBS that displays a web page or an HTML file. Click the plus under Sources, pick Browser and give the source a name. In the next window tick Local file and select the
widget.html. The hub shows you the full path to it at the end, ready to copy. Set Width 1920 and Height 1080: the overlay positions itself inside that area, so it wants the full canvas rather than a small box.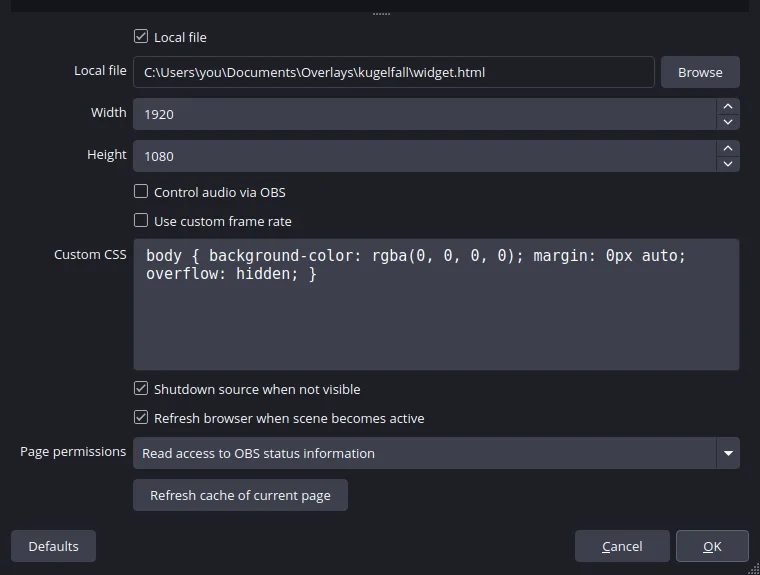
These four entries are all it takes. The path is the folder you picked in the hub, shown here as a Windows example. -
03
Test it and go live
Right-click the browser source, then Refresh. Now type the start command in your own chat. The hub tells you which one at the end, and so does each overlay's own page; for Ball Drop it is
!kugel. If the overlay reacts, you are done. If it does not, it is almost always a typo in the channel name.The moment it all leads up to: one command in chat and the overlay in your scene reacts. Shown here with the free Ball Drop overlay. -
04
Change something later
Colours, commands, stakes and payout are all in the Config Hub under Settings, and it rewrites the
config.jsfor you. It also tells you when a new build of an overlay is out; updating keeps your settings. After any change, refresh the browser source in OBS once, otherwise it keeps running the old version. If you would rather edit it yourself:config.jsis an ordinary text file and opens in any editor.
Frequently asked
// In short
I see nothing, what am I doing wrong?
Check three things in this order: is Local file ticked, does the source point at the widget.html in the folder you picked in the hub, and did you refresh the source after your last change? Almost every case is one of those three.
What do I have to grant the Config Hub?
Access to exactly the folder you pick yourself, once. That is where it writes, and nowhere else. Everything else happens in your browser: your channel name and your bot's credentials end up in the config.js on your own drive and are never sent to me.
Do I need a bot?
Not to begin with. The overlays run on their own. A bot only becomes necessary once points should be paid out automatically. That means your chat bot's own currency, not Twitch channel points, and the Streamer.bot connection guide covers that.
Does it run on Mac and Windows?
Yes, and on Linux too. A browser source exists in OBS on all three. The Config Hub needs Chrome or Edge on any of them; without one, the manual route from step 1 is still there and works everywhere.
Does it cost anything?
Some of the overlays are free and ready to go straight from the hub, the more elaborate ones I unlock on request. Which is which is stated on each card in the Config Hub. Free means free: no subscription, no account, no server, the file runs in your own OBS.
Last updated on July 31, 2026.